How it works
From blank canvas to a finished plan.
Five steps to a complete, to-scale floor plan — then export it or share it.
Step 1
Draw the walls
Click to lay walls. They snap to the grid and to each other, sharing nodes as you go — so corners close cleanly and a wall you start mid-span becomes a tidy T-junction. Move any node later and the connected walls follow.
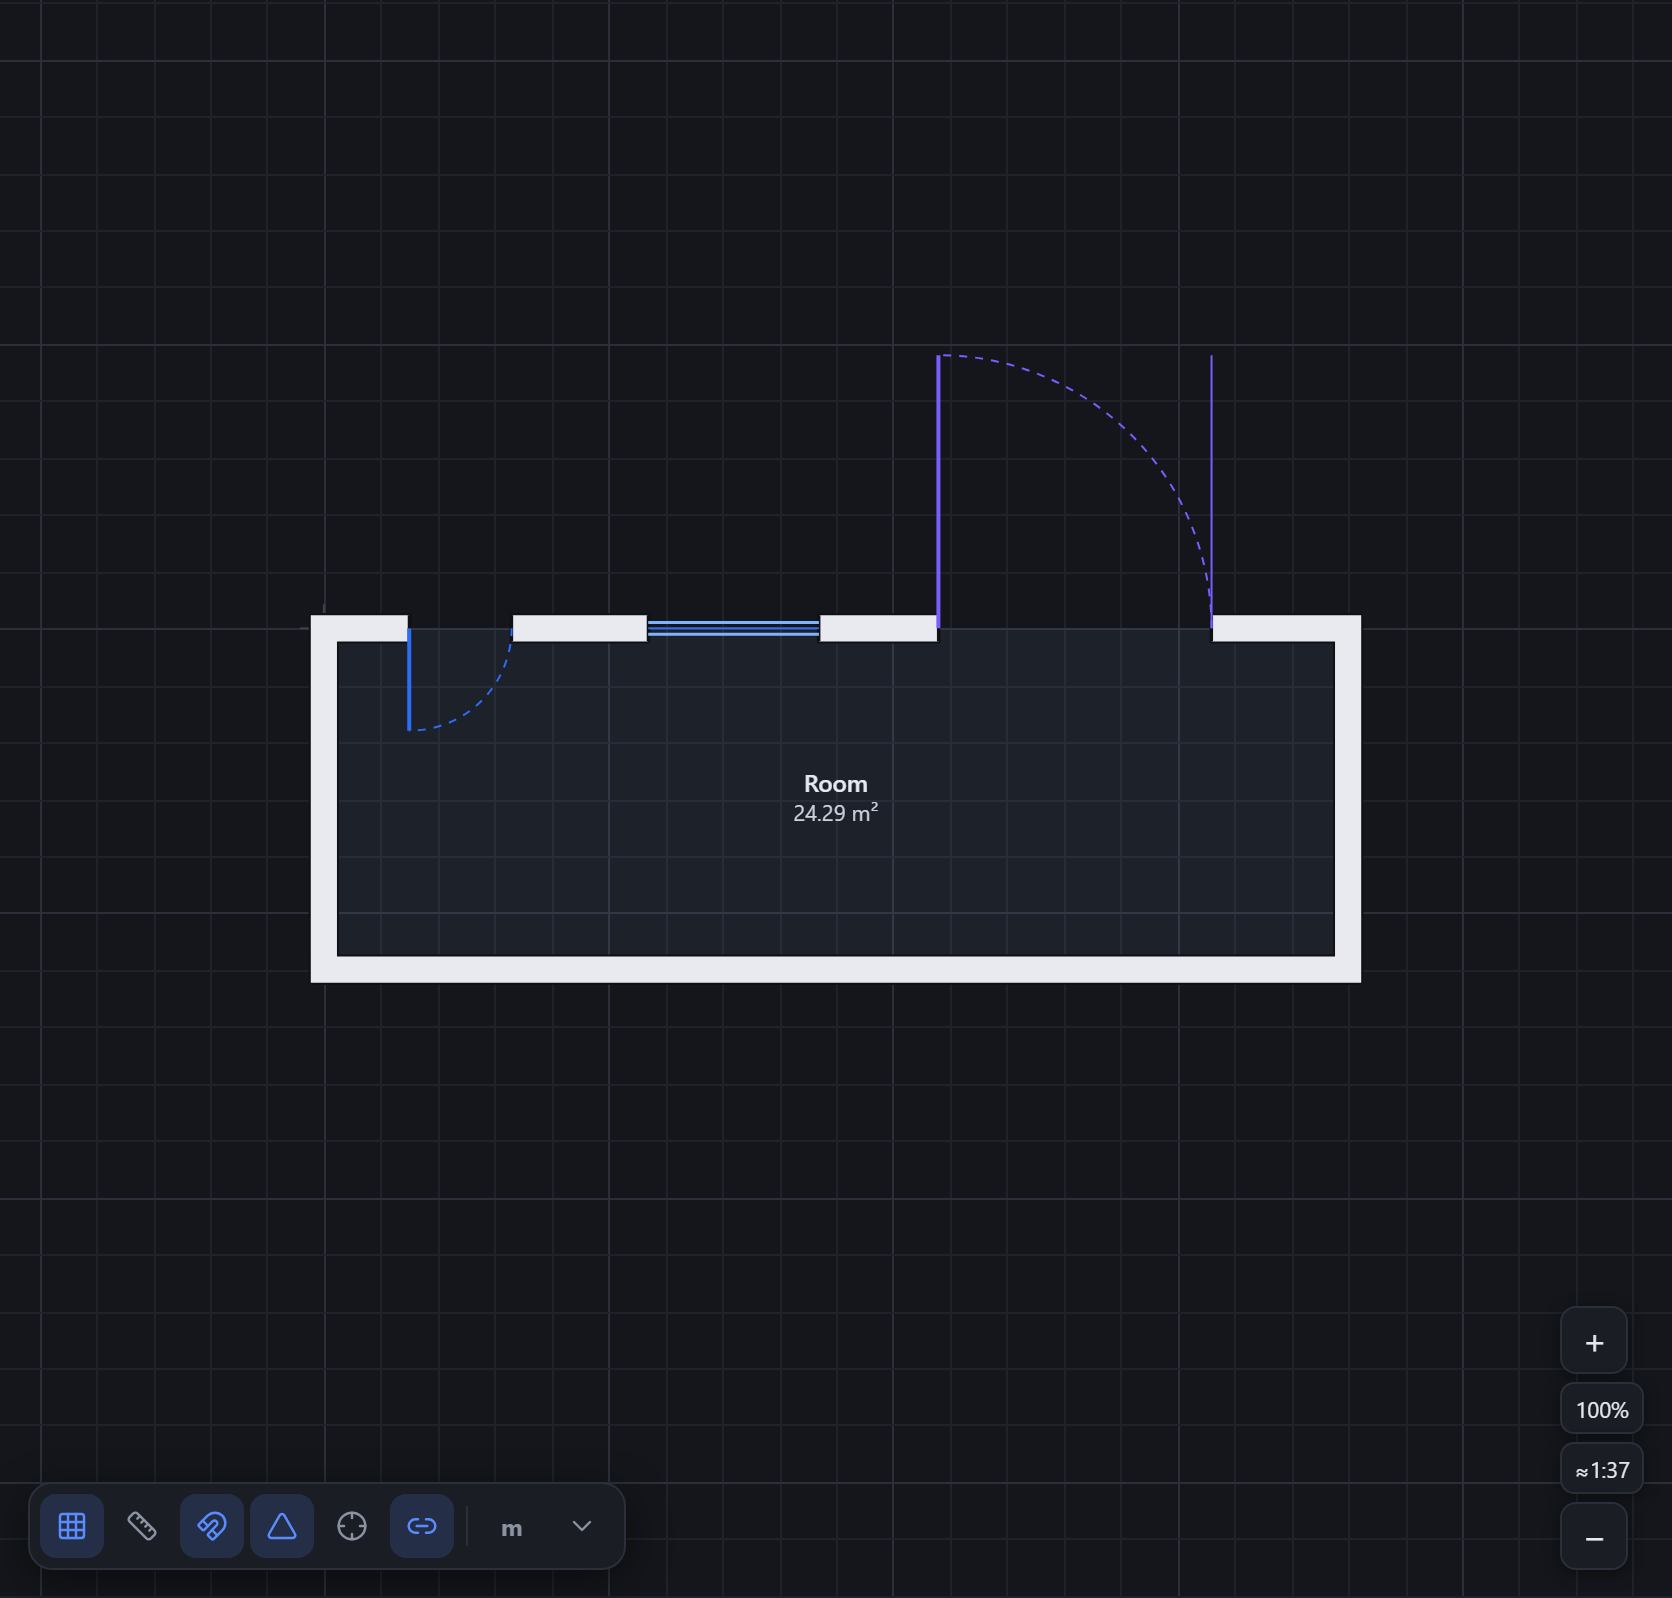
Step 2
Add doors and windows
Drop doors, windows and gates straight onto a wall. Each one sits at an offset along the wall and slides with it if you change the wall later. Set widths, heights and door swings to match the real opening.
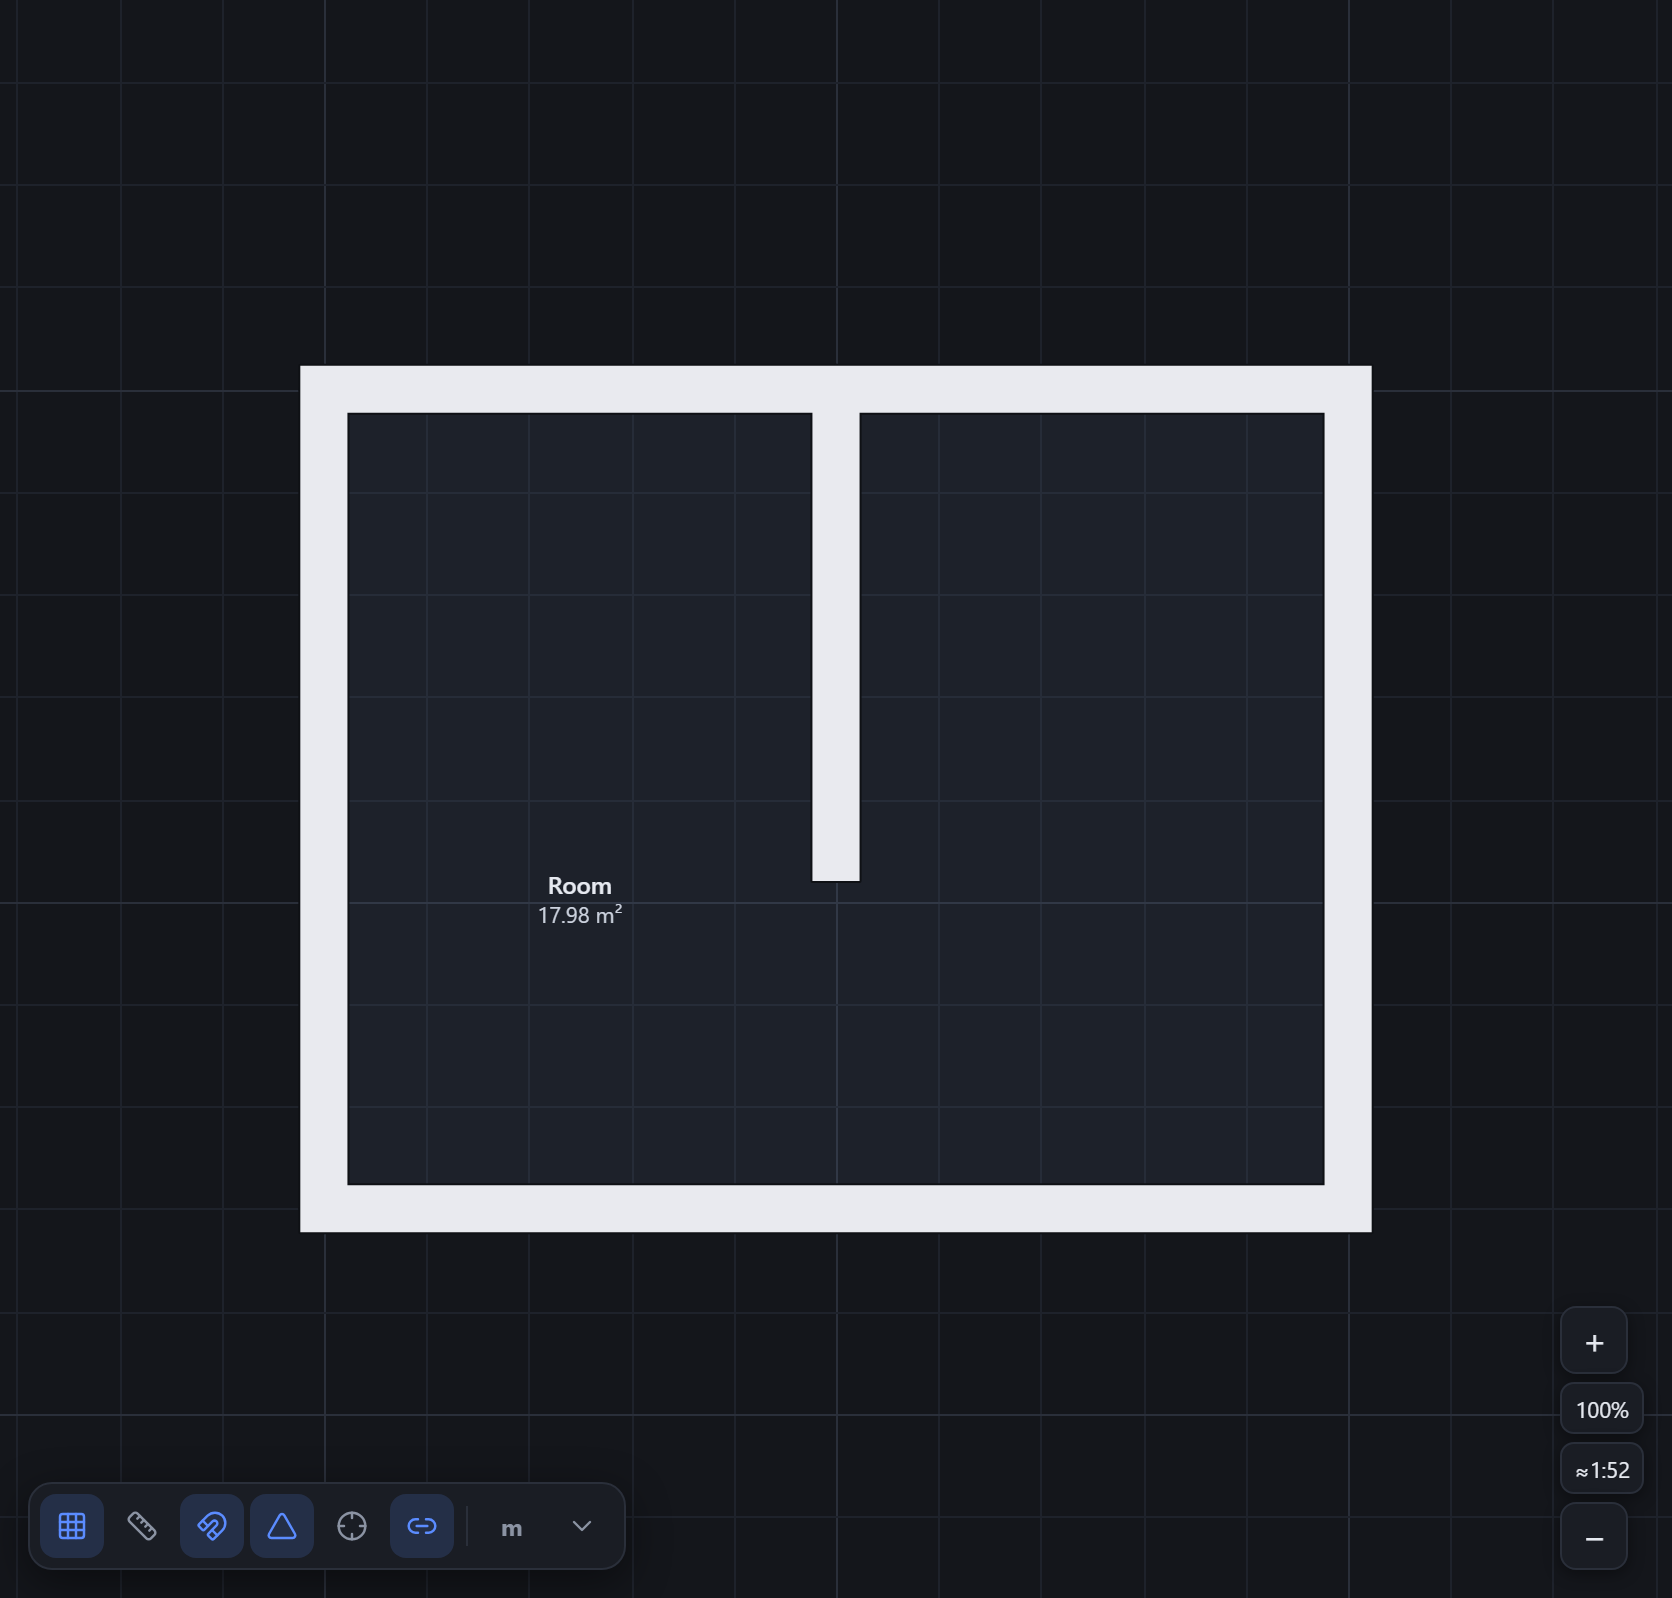
Step 3
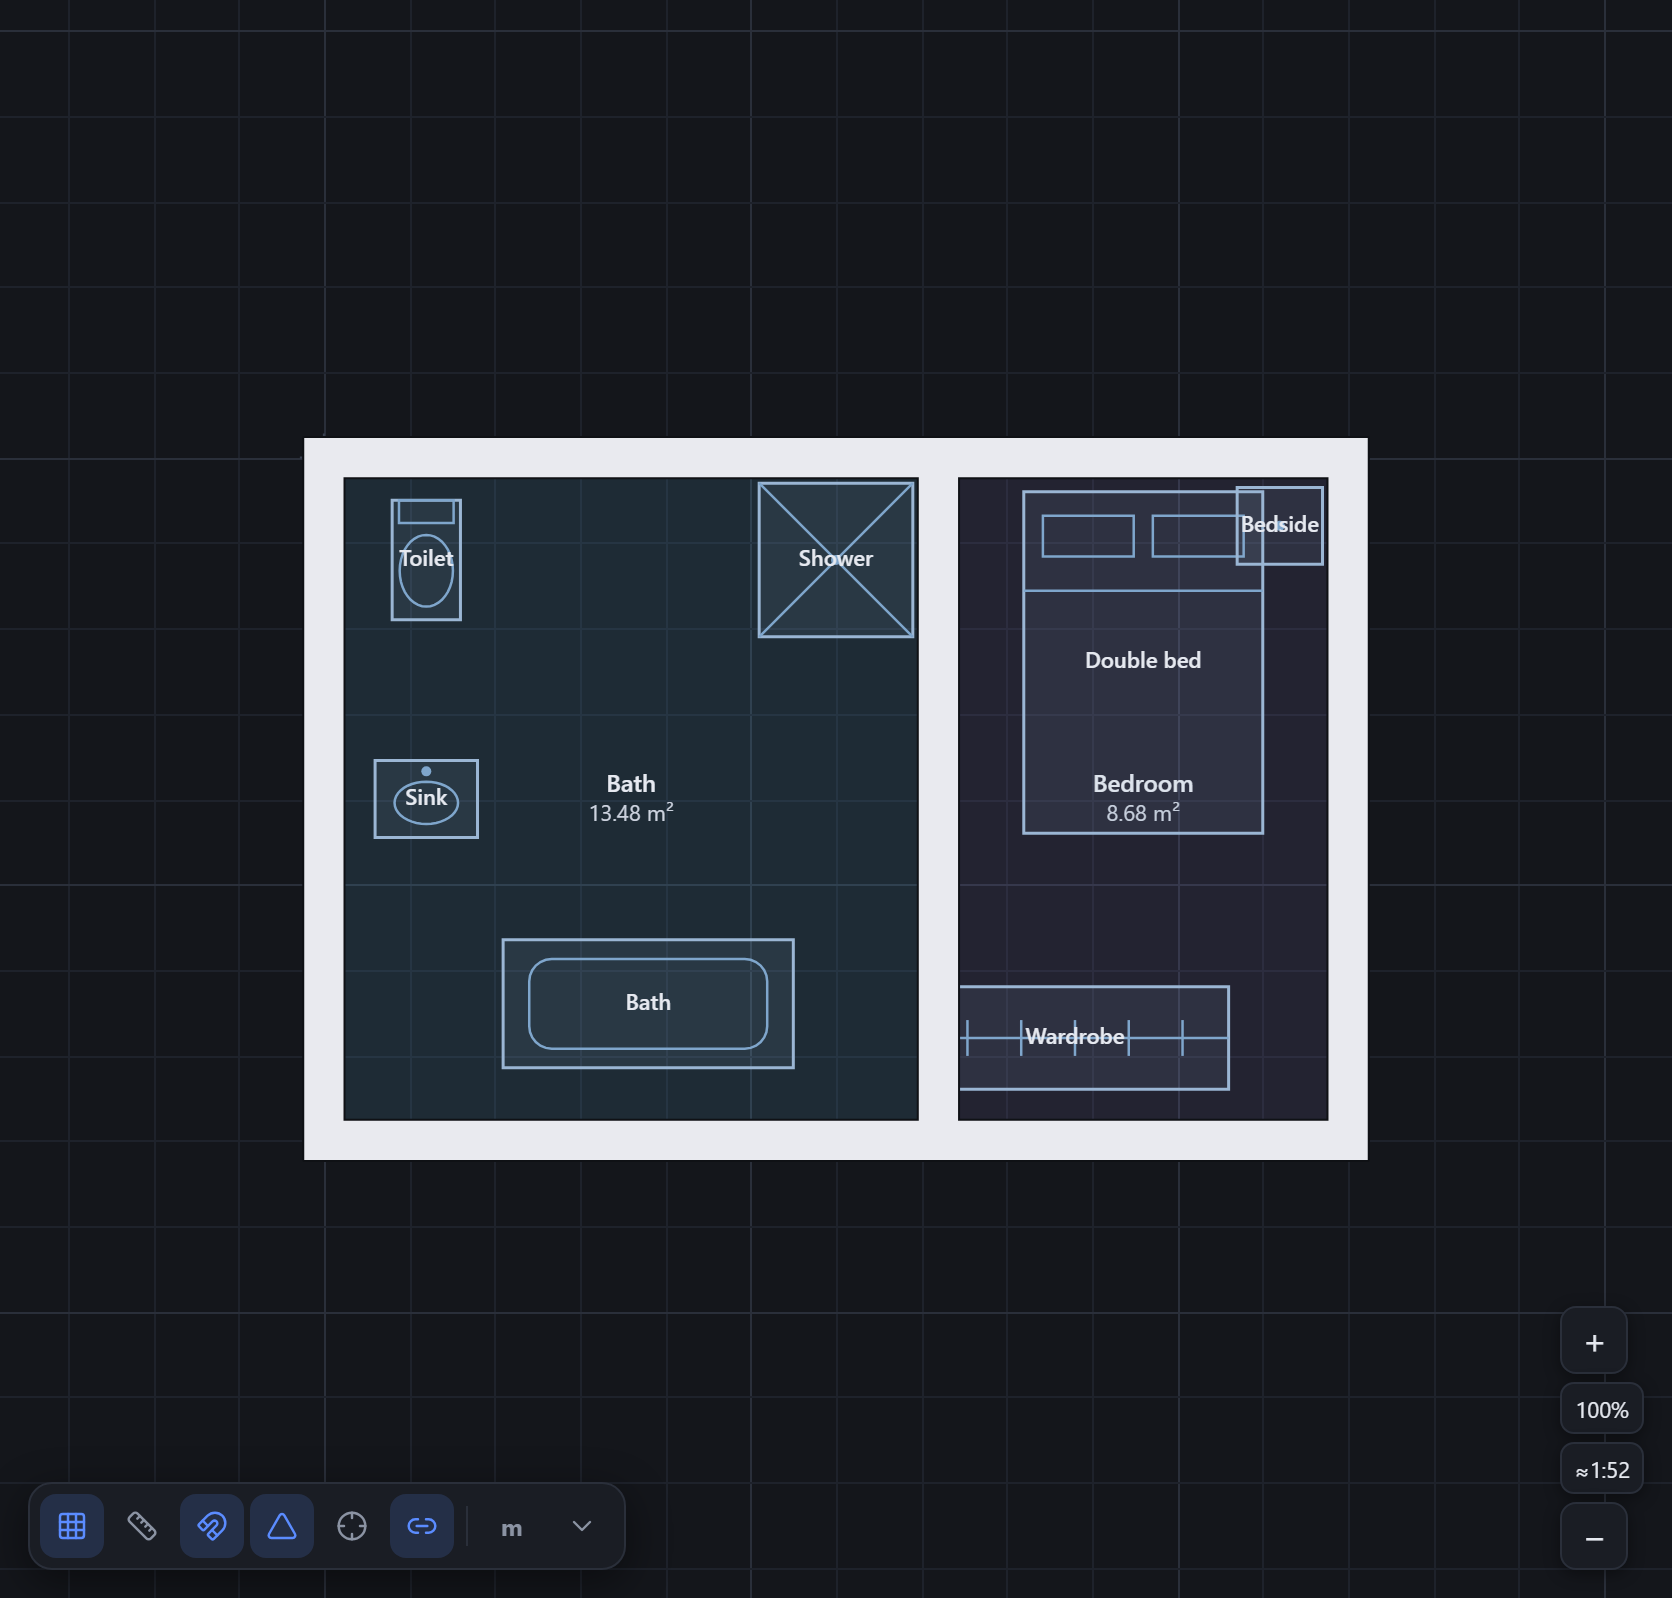
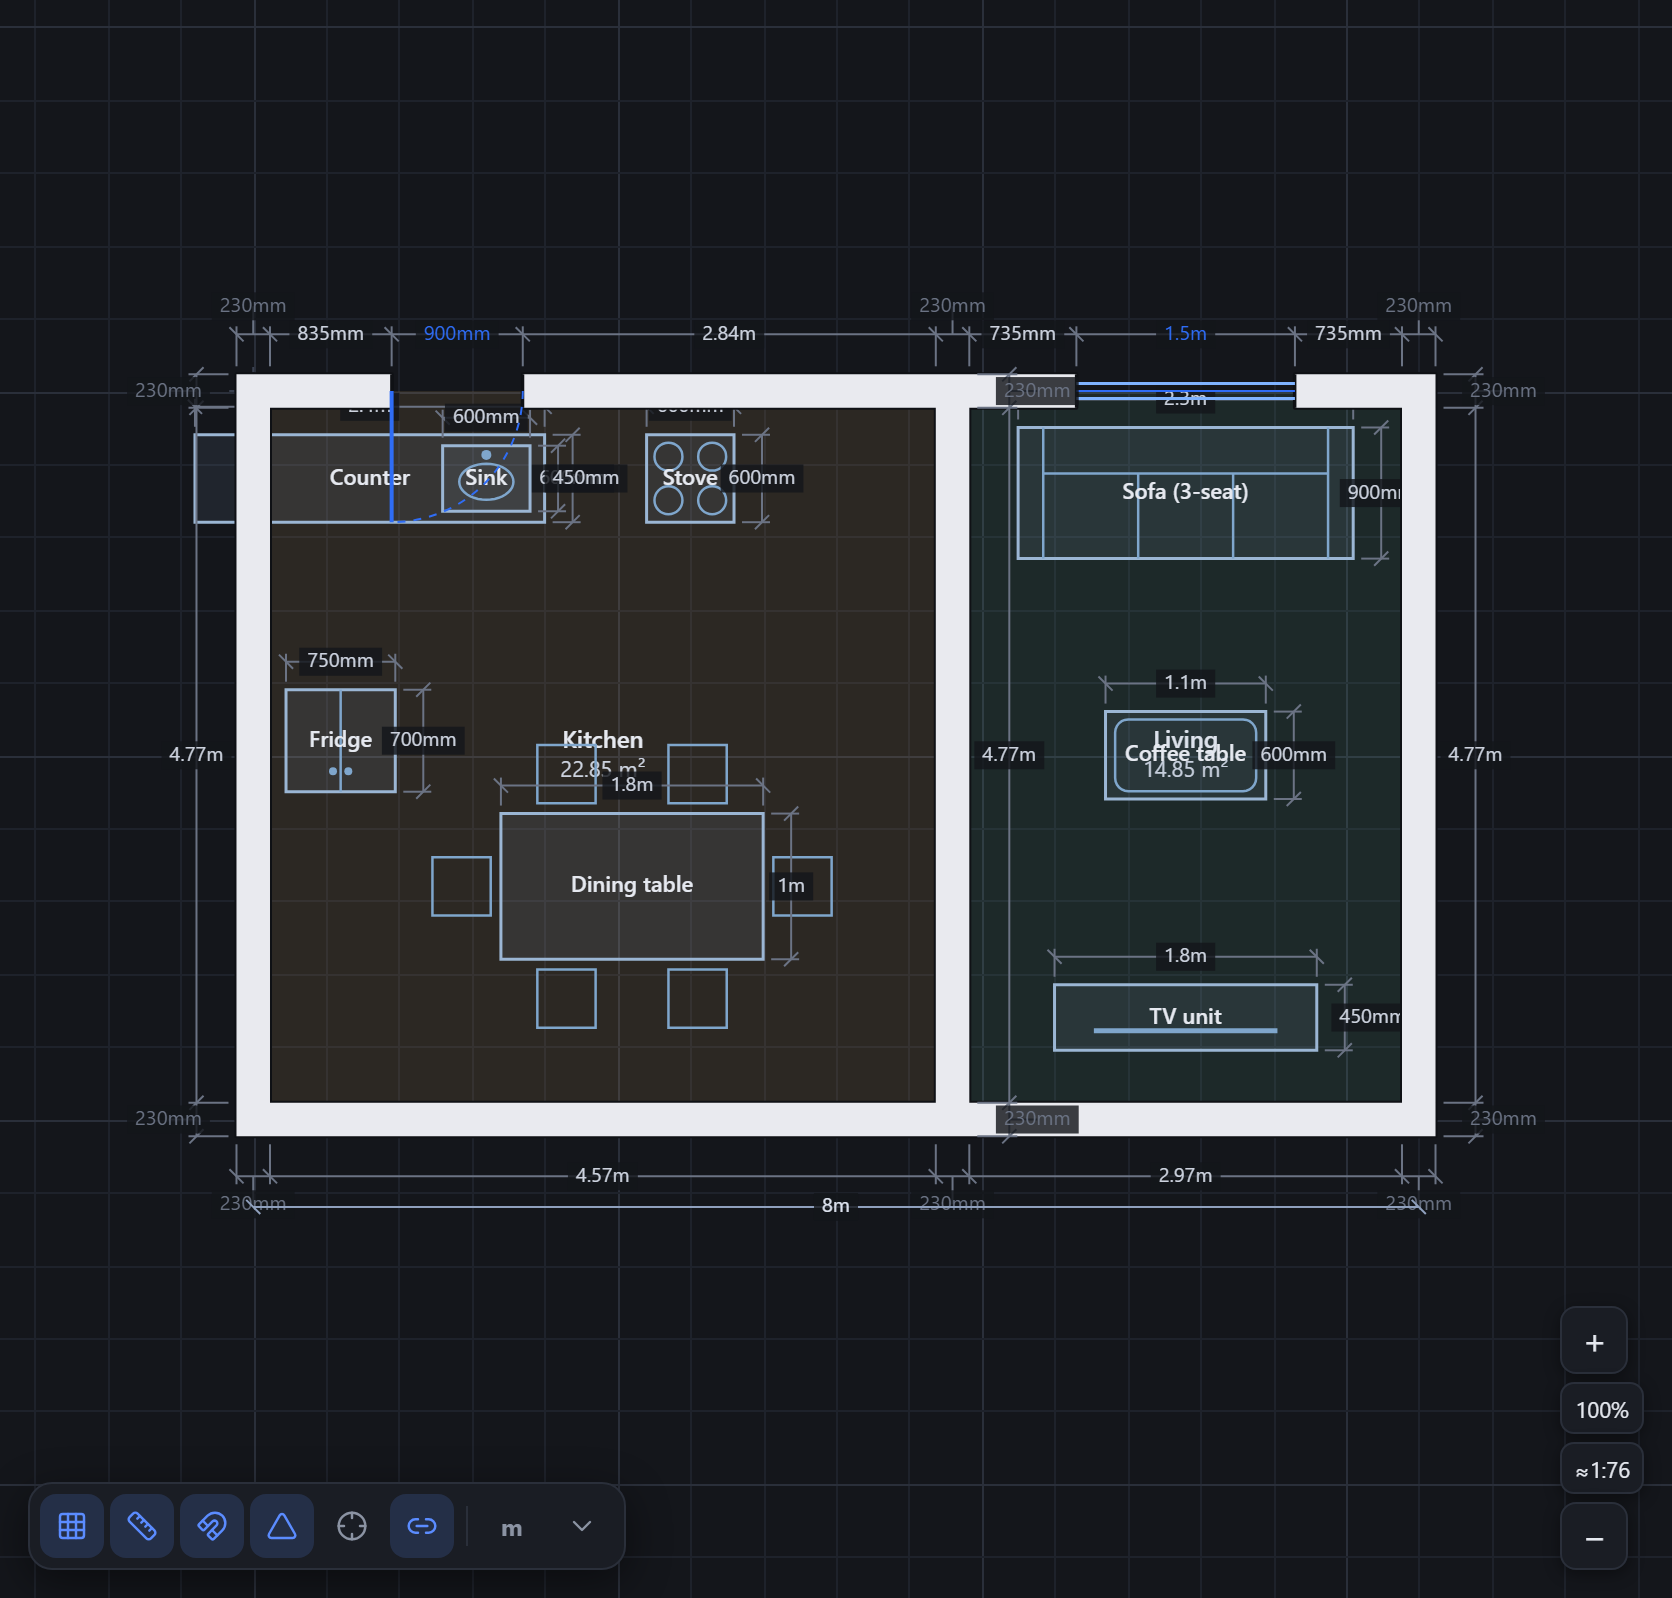
Furnish and label rooms
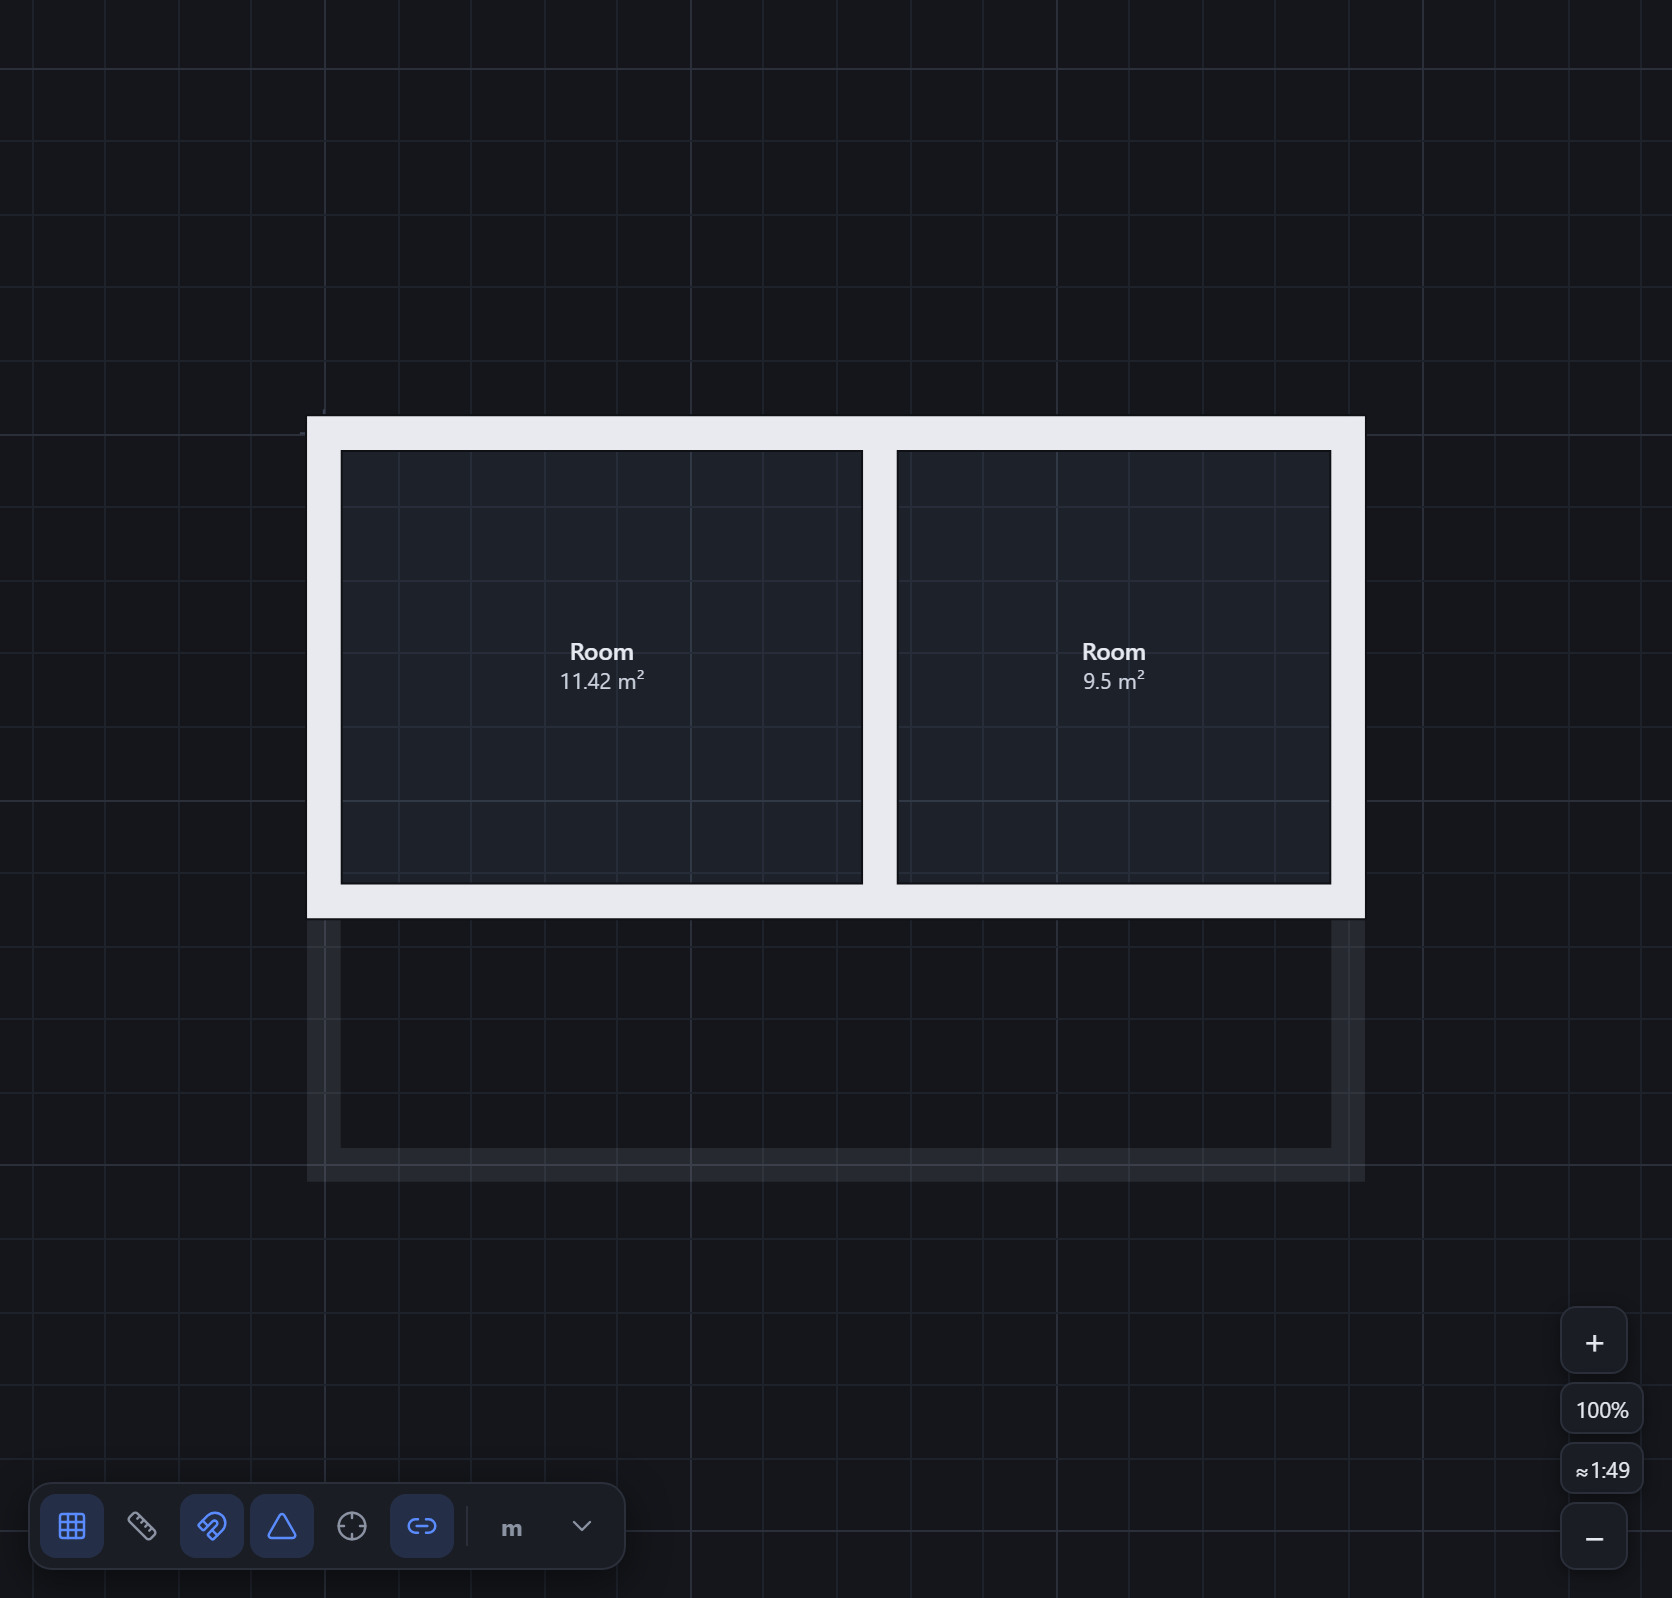
Place fixtures from the built-in library — beds, sinks, sofas, counters and more — drawn to real sizes. Close a loop of walls and Tarkhan detects the room and its area; name it whenever you like.
Step 4
Dimension and annotate
Walls already carry editable dimensions; add your own dimension lines and text notes to call out anything that matters. Click a length to type an exact value.

Step 5
Stack more floors
Add storeys and draw each one with the floor below ghosted underneath for alignment. Duplicate a floor to carry its walls upward and adjust from there.
Step 6
Export or share
When the plan is ready, send it to CAD as DXF or SVG on named layers, print it to a true-to-scale PDF, or grab a PNG. Prefer to just show someone? Turn on a read-only share link — they can view the plan without an account.
- DXF / SVG for CAD, on named layers
- Print-to-scale PDF (A4, A3 or Letter)
- PNG snapshot or a JSON save file
- Read-only public share link
Try it now — it’s free.
The editor is free and opens instantly — no install, no signup to start.
Open the editor →